Android reverse engineering for beginners - Frida
This article is the second of a series where I use the kbg messenger Android CTF to demonstrate the basics of Android reverse engineering. The KGB messenger CTF contains 3 challenges that should be solved sequentially:
- Alerts (medium) <-- we study this one
- Login (easy)
- Social Engineering (hard)
In this series, I use the first challenge Alerts to introduce you to multiple Android Reverse engineering tools. In the first post I demonstrated how to solve the challenge by decompiling the apk and patching the smali code with JADX, APKLab and apktool. In this post, we'll solve this challenge using dynamic analysis with Frida.
About Frida
Frida is a Python tool working on Windows, macOS and GNU/Linux allowing you to inject snippets of code into native apps. In this tutorial we'll use Frida to inject code into Android applications but you could use it for Windows, macOS, GNU/Linux, iOS and QNX applications.
Frida works in a client-server architecture. The server runs on the Android phone and the client on your computer. Note that you need to be root on your phone for frida to work.
Lab setup
adb and phone setup
You should refer to the previous article to learn how to install and use adb on your test phone.
My setup consists of an Ubuntu 18.04 machine and a Samsung Galaxy S7 (SM-G930F) with a rooted LineageOS 14.1-20180712-NIGHTLY-herolte. You could also use an emulator if you don't have an Android phone to perform your tests.
Frida installation
Installing Frida on your computer is a breeze:
pip install frida-toolsNote that the latest Python 3 is recommended. Lets check which version is installed:
frida --version
12.6.16
Now that we have installed the client, we need to install the server on our Android phone. We download frida-server for Android from the releases page while making sure that the major version matches. In my case I downloaded "frida-server-12.11.18-android-arm64.xz".
We uncompress the archive and rename the server to "frida-server"
unxz frida-server-12.11.18-android-arm64.xz
mv frida-server-12.11.18-android-arm64 frida-server
And install the server on the phone:
adb root # might be required
adb push frida-server /data/local/tmp/
adb shell "chmod 755 /data/local/tmp/frida-server"
Now we can start the server. This last step must be done as root:
adb shell "/data/local/tmp/frida-server &"Finally run adb devices -l to make sure the adb daemon is running.
Frida test
The official documentation provides a quick test to make sure everything is working. Run:
frida-ps -UThis should give you something like:
 PID  Name
----  ------------------------------------
5419  adbd
4477  android.process.acore
4313  android.process.media
Now that everything is setup, lets have a quick refresher about the kgb-messenger challenge.
Static analysis reminder
You'll find the detailed static analysis in the previous article, here is a quick reminder. When we open the app, we are greeted with an error message saying:
Integrity error
This app can only run on Russian devices.
When we decompile the apk we find three activities:
- LoginActivity
- MainActivity
- MessengerActivity
The MainActivity is the one performing the checks inonCreate():
public void onCreate(Bundle bundle) {
    super.onCreate(bundle);
    setContentView((int) R.layout.activity_main);
    String property = System.getProperty("user.home");
    String str = System.getenv("USER");
    if (property == null || property.isEmpty() || !property.equals("Russia")) {
        a("Integrity Error", "This app can only run on Russian devices.");
    } else if (str == null || str.isEmpty() || !str.equals(getResources().getString(R.string.User))) {
        a("Integrity Error", "Must be on the user whitelist.");
    } else {
        a.a(this);
        startActivity(new Intent(this, LoginActivity.class));
    }
}
The app uses System.getProperty("user.home") and verifies that the result is "Russia".
Getting started with Frida
Frida provides dynamic instrumentation through a library written in C. This core library injects QuickJS into the target processes, where your JS gets executed with full access to memory, hooking functions and even calling native functions inside the process. There’s a bi-directional communication channel that is used to talk between your app and the JS running inside the target process.
You can use C directly to use Frida to inject QuickJS but the project provides Python bindings to help you do so.
Python code
To keep things simple, let's forget about the Javascript code for a moment and focus on the python code.
In this subsection we will create a python script that launches the application with Frida.
To do so we start by importing the frida library and we retrieve the device with get_usb_device().
Then we use the spawn() function to start the kgb-messenger application.
Finally we need to use resume() to make sure the app doesn't crash (I don't know why but here is the related issue).
import frida
device = frida.get_usb_device()
pid = device.spawn(["com.tlamb96.spetsnazmessenger"])
device.resume(pid)
If you run the above script with python3 launch_app.py, the kgb-messenger app starts.
If we wanted to kill the application, we would have to:
- List all the running processes with
enumerate_processes() - Select the processes where the name match our package name
- Use the
kill()function to kill these processes
import frida
package_name = "com.tlamb96.spetsnazmessenger"
device = frida.get_usb_device()
processes = device.enumerate_processes()
process = [p for p in processes if p.name == package_name]

if process[0] is not None:
    device.kill(process[0].pid)
Javascript code
We have seen the basics of what Frida can do but for the moment it just looks like a glorified adb API. Frida can do much more since it can inject Javascript code allowing us to hook functions.
As usual let's start with a bare bones example.
We create a script hello_frida.js that consists of a simple logging:
console.log("I managed to use Frida!");Then we create a python script run_frida_script.py that will inject this Javascript code in the application:
import frida
device = frida.get_usb_device()
pid = device.spawn(["com.tlamb96.spetsnazmessenger"])
session = device.attach(pid)
script = session.create_script(open("hello_frida.js").read())
script.load()
device.resume(pid)

# Prevent the script from terminating
input()
When we run python3 run_frida_script.py, the application starts and here is the standard output:
I managed to use Frida!Not impressive enough? Let's move on to something more interesting.
Function hooking
We saw in the static analysis that System.getProperty("user.home") is called and then checked to see if it is equal to "Russia".
With Frida we are able to intercept this call and modify the return value: that's called hooking. Below is the code that does just that. You can find the complete reference of what the Javascript API can do on the official documentation.
console.log("Inspecting getProperty");
Java.perform(function() {
    // Retrieve the class with Java.use
    const System = Java.use("java.lang.System");
    // Select the correct overload of getProperty
    const propertyMethod = System.getProperty.overload('java.lang.String');
    // Modify the implementation
    propertyMethod.implementation = function (prop) {
        // Log the event
        console.log("getProperty('" + prop.toString() + "') called" );
        // Log the original value
        const ret = propertyMethod.call(this, prop);
        console.log("Value is: '" + ret + "'");
        // Change the return value
        return "Russia";
    }
});
Note that the function getProperty has two overloads, so we have to be careful to hook the right one. More on that in the Frida tips section below.
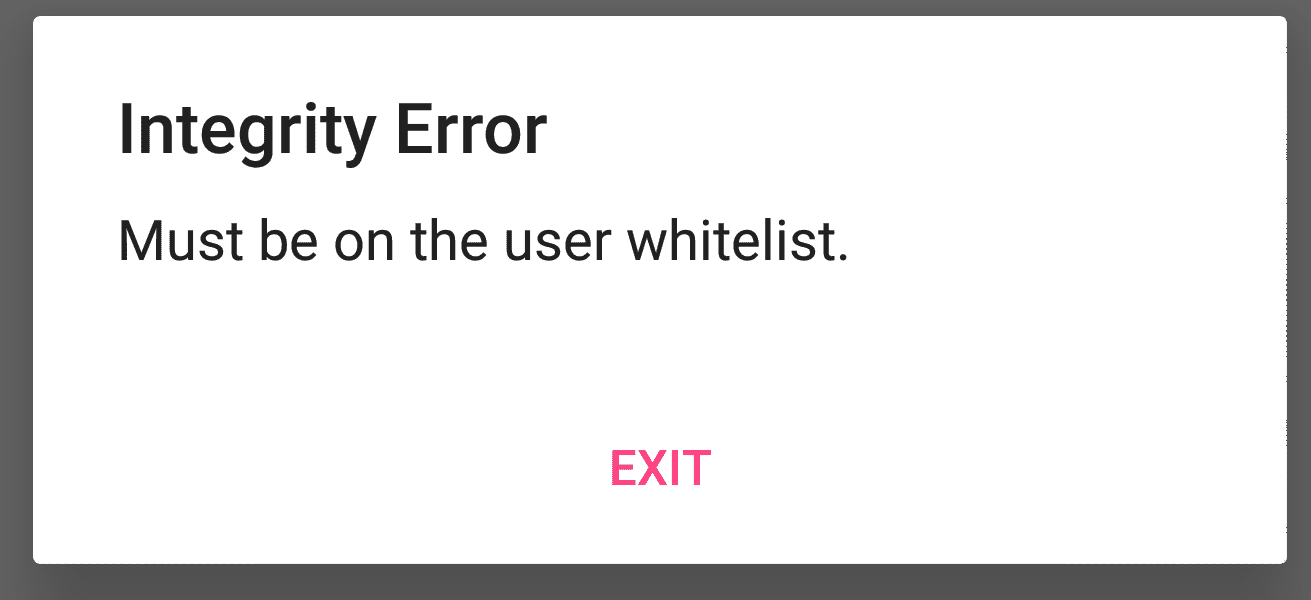
If we launch our exploit with python3 run_frida_script.py, the original alert "This app can only run on Russian devices" does not appear anymore. Instead we get a new one saying:
Must be on the user whitelist
So we just managed to hook a function and modify its return value!
Function inspection
Let's get back to the decompiled code to get a better understanding of what's happening:
// Check that the property user.home == "Russia"
String property = System.getProperty("user.home");
String str = System.getenv("USER");
if (property == null || property.isEmpty() || !property.equals("Russia")) {
    a("Integrity Error", "This app can only run on Russian devices.");

// Check that the user is on the whitelist
} else if (str == null || str.isEmpty() || !str.equals(getResources().getString(R.string.User))) {
    a("Integrity Error", "Must be on the user whitelist.");

// Start the login activity
} else {
    a.a(this);
    startActivity(new Intent(this, LoginActivity.class));
}
The application performs two checks:
- First, it verifies that the property
user.homeis equal to "Russia". We managed to bypass this check by hooking the functionSystem.getProperty(). - Second, it verifies that the environment variable
USERis equal to the string resourceR.string.User. If this check fails, it displays our new message "Must be on the user whitelist".
What we would like to do is get the value of R.string.User with Frida. To do so we can hook the getString() function, but right now, if we just hook this function we will never get the value we're looking for. This is because the function will never be called. We have to make sure that every check before this call is valid, and that means:
- having a value
propertyequal to "Russia" - having a value
strthat is not null and not empty
We could solve this part by retrieving the string resource named User in /res/value/strings.xml after decompiling with apktool. I chose not to for learning purposes.
In the example below we make sure that all the prerequisites are met. Then we inspect the function getString() without modifying its return value.
To do so we use the call() method to call the original function and get its value.
console.log("Inspecting getString");
Java.perform(function() {
    // Hook System.getProperty
    const System = Java.use("java.lang.System");
    System.getProperty.overload('java.lang.String').implementation = function (prop) {
        return "Russia";
    }
    // Hook System.getenv
    System.getenv.overload('java.lang.String').implementation = function (str) {
        return "whatev";
    }

    // Inspect getString
    const Resources = Java.use("android.content.res.Resources");
    const getStringMethod = Resources.getString.overload('int');
    getStringMethod.implementation = function (resId) {
        console.log("getString('" + resId.toString() + "') called" );
        const ret = getStringMethod.call(this, resId);
        console.log("Value is: '" + ret + "'");
        return ret;
    }
});
Here is the output we get after running our script:
Inspecting getString
getString('2131558400') called
Value is: 'RkxBR3s1N0VSTDFOR180UkNIM1J9Cg=='
Now we can change our getenv how so that it returns the expected value, and we access the login page! You now know the basics of Frida, if you're still interested, I've listed some additionnal tips and interesting blog posts I found about Frida.
Frida tips and examples
In this section I will give you some additional tips about Frida. If you would like to browse more examples, you find some on Frida CodeShare.
Running without python
In the previous examples we used some python code to start the app and load our javascript hook commands. We can actually do all of that without python with the following command:
frida -U -f com.tlamb96.spetsnazmessenger -l inspect_getstring.js-Uindicates that we want to connect to a USB device-fspecifies which file (application) to spawn-lspecifies which script to load
The command opens a shell where we can write some GumJS code. The first thing to do is to use %resume to let the main thread start. Then our logs will appear:
     ____
    / _  |   Frida 12.6.16 - A world-class dynamic instrumentation toolkit
   | (_| |
    > _  |   Commands:
   /_/ |_|       help      -> Displays the help system
   . . . .       object?   -> Display information about 'object'
   . . . .       exit/quit -> Exit
   . . . .
   . . . .   More info at http://www.frida.re/docs/home/
Spawning `com.tlamb96.spetsnazmessenger`...
Inspecting getString
Spawned `com.tlamb96.spetsnazmessenger`. Use %resume to let the main thread start executing!
[Samsung SM-G930F::com.tlamb96.spetsnazmessenger]-> %resume
[Samsung SM-G930F::com.tlamb96.spetsnazmessenger]-> getString('2131558400') called
Value is: 'RkxBR3s1N0VSTDFOR180UkNIM1J9Cg=='
The shell has autocompletion and suggestions. You can use it to write the javascript code we've been using up until now. Try to run the following command in the shell:
[Samsung SM-G930F::com.tlamb96.spetsnazmessenger]-> Java.perform(function() { console.log(Java.enumerateLoadedClassesSync()) })Get info about an unknown object
This tip was given to me by Dexcalibur's creator. Sometimes you will retrieve a javascript object and you would like to know what it contains. If your object is v, you can use this snippet to display its keys and values:
Object.keys(v).map(function(k) {
    console.log(k, v[k])
})
For instance:
Java.perform(function() {
    const Resources = Java.use("android.content.res.Resources");
    Object.keys(Resources).map(function(k) {
        console.log(k, Resources[k])
    })
});
Enumerate methods
In this example we use the Java.enumerateMethods() API to list the methods of the class MainActivity.
console.log("Enumerating methods of MainActivity");
Java.perform(function() {
  const groups = Java.enumerateMethods('*MainActivity*!*');
  console.log(JSON.stringify(groups, null, 2));
});
The result is this output:
Enumerating methods of MainActivity
[
  {
    "loader": null,
    "classes": [
      {
        "name": "com.tlamb96.kgbmessenger.MainActivity",
        "methods": [
          "$init",
          "a",
          "onBackPressed",
          "onCreate"
        ]
      }
    ]
  }
]
Overloads
Most of the time, multiple functions share the same name while having different signatures. For instance the function getString has two overloads:
- The first overload is called as
getString(int, java.lang.Object). - The second overload is called as
getString(int).
You can get information about overloaded methods with a script by calling .class.getMethods(). Below is an example showing how to list the signatures of the methods containing "getString" in the class Resources:
console.log("Inspecting overloads");
Java.perform(function() {
    // Inspect getString
    const Resources = Java.use("android.content.res.Resources");
    const methods = Resources.class.getMethods();
    const methodsCount = methods.length
    for (var i = 0; i < methodsCount; i++) {
        var method = methods[i];
        if (method.toString().includes('getString')) {
            console.log(method);
        }
    }
});
And here is the result of a run:
Inspecting overloads
public java.lang.String android.content.res.Resources.getString(int) throws android.content.res.Resources$NotFoundException
public java.lang.String android.content.res.Resources.getString(int,java.lang.Object[]) throws android.content.res.Resources$NotFoundException
public java.lang.String[] android.content.res.Resources.getStringArray(int) throws android.content.res.Resources$NotFoundException
Here we rediscover the two overloads previously mentioned with their full signature.
Message callbacks
When using python to instrument our reverse engineering, the javascript code can send back data to the python script with the method send(message [, data]).
send the JavaScript object message to your Frida-based application (it must be serializable to JSON). If you also have some raw binary data that you’d like to send along with it, e.g. you dumped some memory using NativePointer#readByteArray, then you may pass this through the optional data argument. This requires it to either be an ArrayBuffer or an array of integers between 0 and 255.
In this example we use it to replace console.log when listing the overloads of Resources.getString.
We define a callback called on_message(message, data) and load it with script.on('message', on_message).
Now every time the javascript code uses the method send, our callback is used:
import frida


def on_message(message, data):
    if 'payload' in message:
        payload = message['payload']
        if 'level' in payload:
            print("[{0}] {1}".format(payload['level'], payload['message']))
        else:
            print("[*] {0}".format(message['payload']))
    else:
        print(message)


device = frida.get_usb_device()
pid = device.spawn(["com.tlamb96.spetsnazmessenger"])
session = device.attach(pid)
script = session.create_script(open("message_callbacks.js").read())
script.on('message', on_message)
script.load()
device.resume(pid)
# Prevent script from terminating
input()
In the javascript code we use send to log some information with its level:
send({ level: "info", message:"Inspecting overloads android.content.res.Resources.*getString*"});
Java.perform(function() {
    // Inspect getString
    const Resources = Java.use("android.content.res.Resources");
    const methods = Resources.class.getMethods();
    const methodsCount = methods.length
    send({ level: "debug", message: "Found " + methodsCount + " methods in Resources" })
    for (var i = 0; i < methodsCount; i++) {
        var method = methods[i];
        if (method.toString().includes('getString')) {
            send({ level: "info", message: "Found method: " + method.toString() })
        }
    }
});
Programming with Typescript
Here is a final tip. You can use Typescript to develop your javascript code and get code completion, type checking, inline docs, refactoring, etc.
If you want to try it, clone this example, run npm install and open the folder in VS Code or your favorite IDE. Here is a short demo:
Conclusion
The kgb-messenger app is easy to decompile and reverse, and as such, using Frida to solve this kind of challenge is obviously an overkill. The purpose of this article was to introduce you to Frida and the concepts of dynamic analysis. Even though we mostly relied on static analysis to solve the challenge, you should now have the basics to use Frida and perform dynamic analyses on obfuscated applications.
If you liked Frida, you'll love Dexcalibur: an application built on top of Frida to make it easy to create and manage hooks. It even has a graphical user interface!
Check out these cool blog posts to learn more about Frida: