Your own backup monitoring system
This article is the second of a four part series describing my current backup system.
- In the first article I explain how I use restic to perform my backups.
- In this article I describe how I use Healthchecks and Gotify to verify that the backups run periodically.
- In the third article I show I how automate the backups, in particular when I need to read files with special permissions.
- Finally in the last article I detail the process I had to follow to backup a remote server to a machine on my home local network.
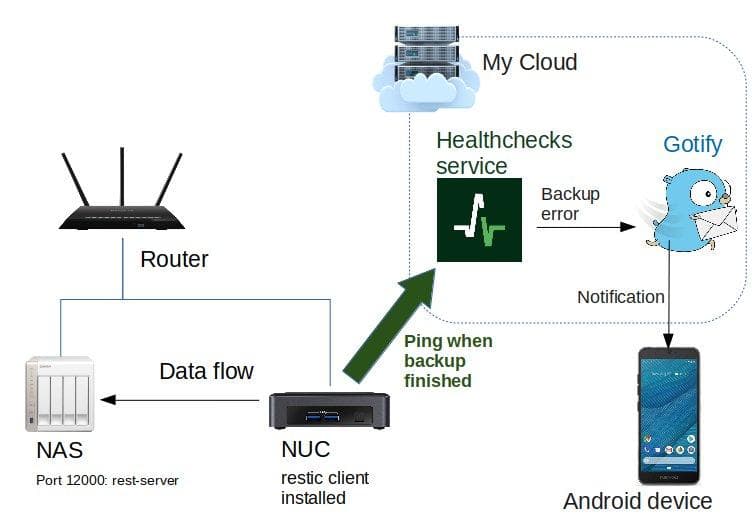
Healthchecks is a cron monitoring tool alerting you when a job didn't run. Gotify is self-hosted service similar to Pushbullet, allowing you to send notifications to your Android phone.
Here is the architecture we are set out to build:
Preventing silent failures
A very simple automation would be creating a script calling restic backup periodically.
But what if for some reason my backup failed ? To be aware of this I would have to keep logs and check them regularly. To avoid silent failures I use Healthchecks.io. I can program my healthchecks server to expect some calls at a certain frequency. In my backup script I add a line to call my healthchecks server:
curl --retry 3 https://hc-ping.com/5b3203dd-caa6-45de-830b-22a771d94d19When healthchecks does not receive the ping at the expected time, I receive an alert. The backup script flow is detailed below:
Healthchecks also gives me the ability to signal a failure. I use this ability here to signal an impossibility to back up due to the storage being unreachable.
Script
I didn't want this article to be too long, so I decided to focus on the configuration of Healthchecks and Gotify. If you want to know more about how I set up my scripts, go on to the third article of this series. The summary is that I use a cron job calling a python script loading a YAML config file.
Healthchecks installation
Let's get started by installing Healthchecks. We will move on to the alerting system later on.
Healtchecks docker-compose
Here is an example docker-compose file to get you started. I won't explain how to create a reverse proxy with Nginx here.
version: '2'
services:
  healthchecks:
    container_name: 'healthchecks'
    image: linuxserver/healthchecks:latest
    environment:
      - PUID=1001
      - PGID=1001
      - SUPERUSER_EMAIL=my@email.com
      - DOCKER_MODS=linuxserver/mods:healtchecks-apprise
      - FILE__SUPERUSER_PASSWORD=./secrets/SUPERUSER_PASSWORD

    ports:
      - 127.0.0.1:22380:8000
    volumes:
      - ./healthchecks_data:/config
    restart: unless-stopped
    depends_on:
      - gotify
The linuxserver/healthchecks docker will automatically create a superuser for you based on the SUPERUSER_EMAIL and SUPERUSER_PASSWORD env variables set up in the docker-compose file. You can use these to log in and you can still change your password through the Account > Site administration menu.
Note that I am using a special environment variable FILE__SUPERUSER_PASSWORD.
This will set the environment variable SUPERUSER_PASSWORD based on the contents of the file ./secrets/SUPERUSER_PASSWORD.
Healthchecks and Apprise
You might have noticed a peculiar environment variable in the docker-compose file:
- DOCKER_MODS=linuxserver/mods:healtchecks-appriseThis lines installs Apprise in the container. Apprise allows you to send notifications with most of the popular notification services available to us today such as: Telegram, Discord, Slack, Amazon SNS, Gotify, etc.
The problem is, the LinuxServer docker does not install Apprise automatically. To install Apprise automatically here, we use a docker mod I created.
The source code for the Docker mod is very simple and available here
Healtchecks configuration
Let's configure the application now, to do so we need to generate the config files.
Run the docker-compose file once with docker-compose up and stop it once it stops pouring logs. Your folder healthchecks_data should now contain a file local_settings.py. Edit this file to modify the config (this is an ongoing issue):
EMAIL_HOST = "smtp.gmail.com"
DEFAULT_FROM_EMAIL = "noreply@example.com"
BASE_URL = "healthchecks.example.com"
EMAIL_USE_TLS = True
SITE_ROOT = "https://healthchecks.example.com"
DEBUG = False
EMAIL_PORT = "587"
SITE_NAME = "healthchecks"
EMAIL_HOST_PASSWORD = "password"
EMAIL_HOST_USER = "username"
ALLOWED_HOSTS = ["healthchecks.example.com"]
CSRF_TRUSTED_ORIGINS = ["healthchecks.example.com"]
If you want to be able to send mails you will have to configure the local_settings.py file accordingly. You can use mailjet to send mails (or even text messages!).
Add the REGISTRATION_OPEN=False variable in local_settings.py to prevent people from registering on your platform.
Healthchecks configuration
At this point, Healtchecks is now up and running and I configured my mailjet account so that healtchecks can send mails (this is not a mandatory step).
Creating a check
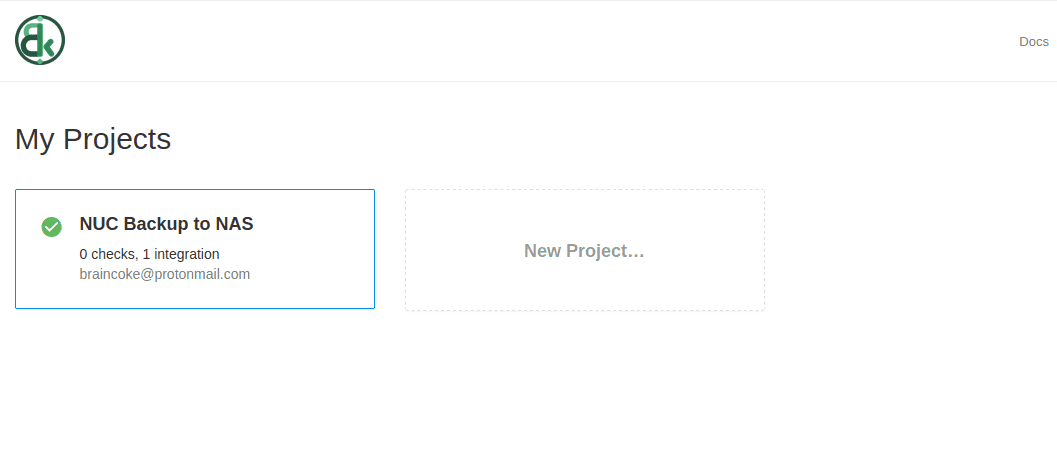
Let's create our first project, mine is called NUC Backup to NAS. On the main page, click on New Project..... You should then have a new project available on the main page.
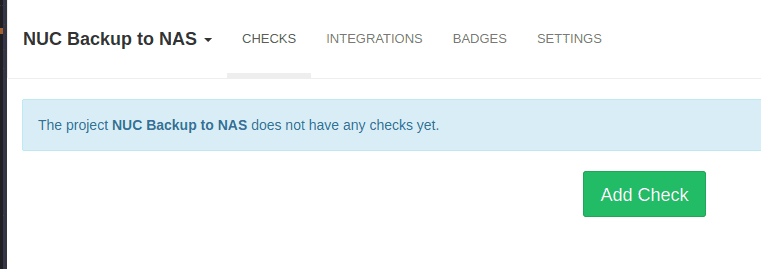
On the new project, we can add a Check in the Checks tab.
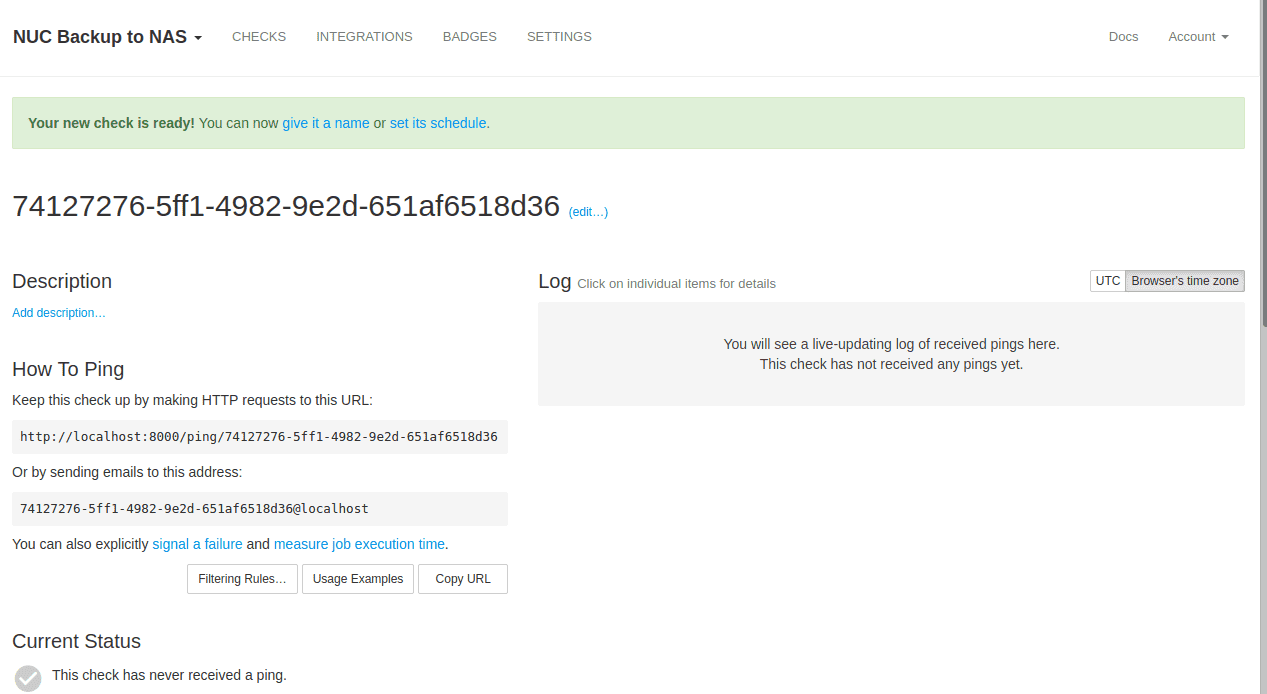
A new check is created and we are given an URL to ping. We can update our script to use this URL.
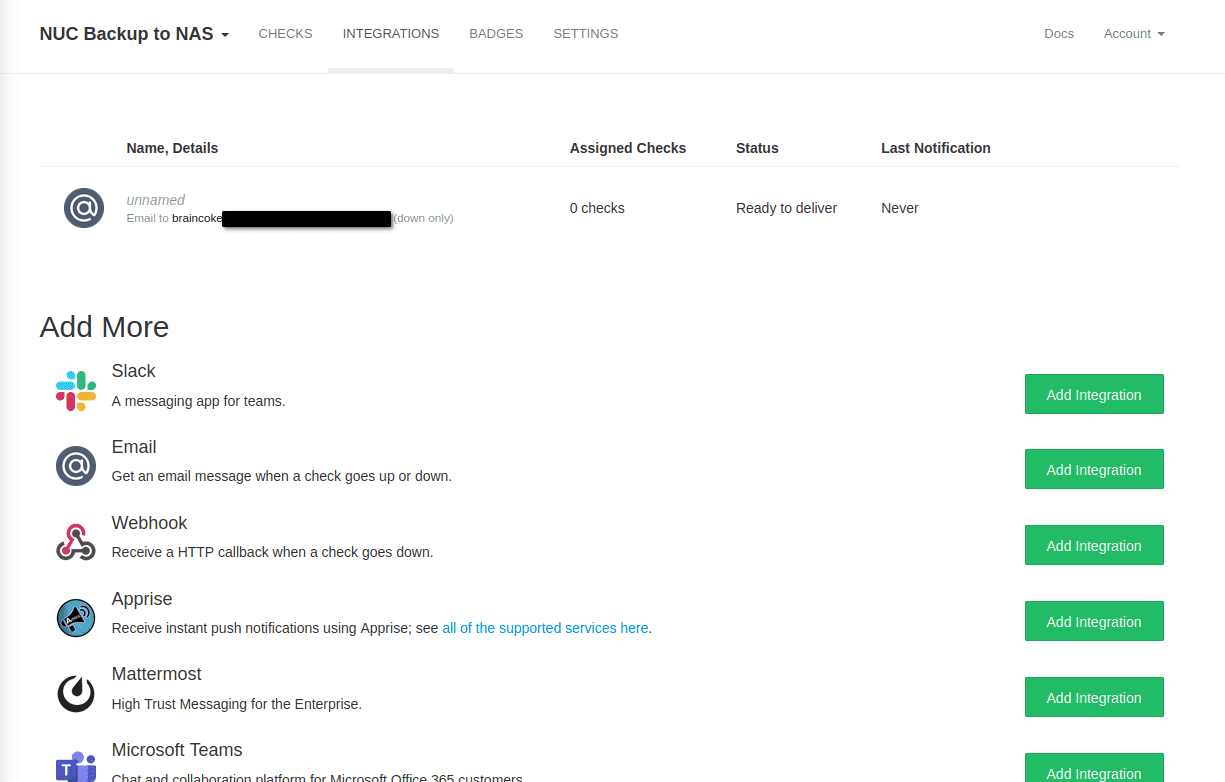
Configuring an alert method
We can configure an alert method in the Integrations page. Here I configured it to send me an email. In the end of this article we will configure it to send a notification through Gotify.
Configuring the check schedule
The most important part of the configuration is the schedule. The schedule describes how often the check has to expect a ping.
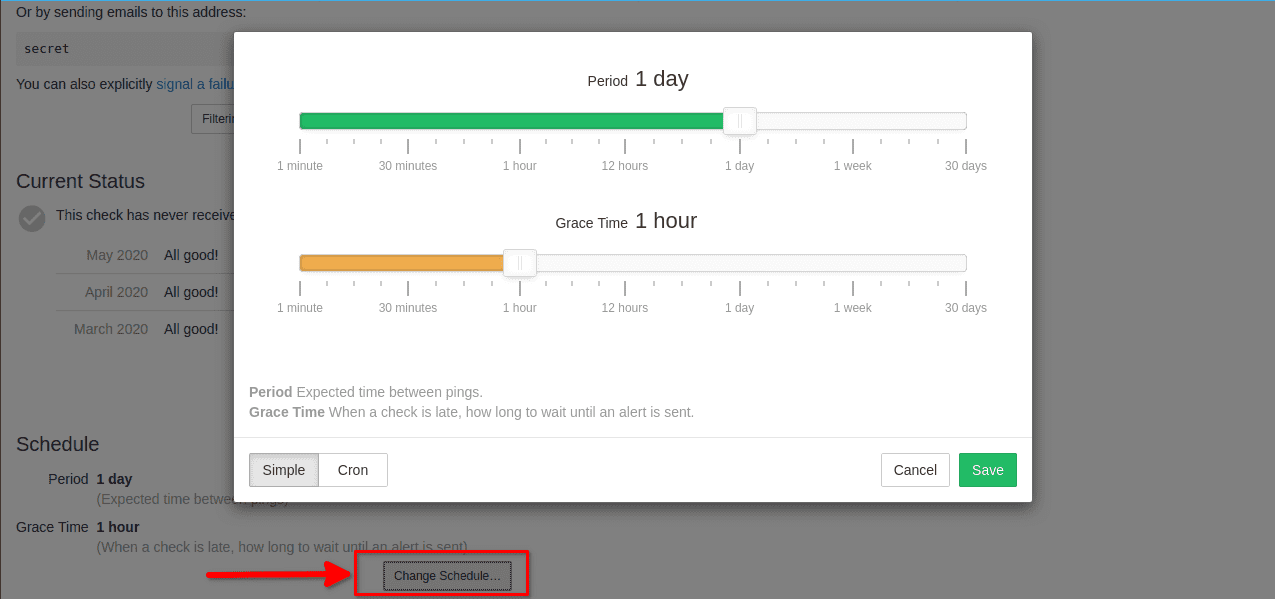
We can either use the simple configuration with sliders or the cron configuration that uses the same syntax as cron jobs. For the time being let's leave it at 1 day for the period and 1 hour for the grace time. We can test the check by navigating to the URL.
Measuring execution time
To measure execution time we have to send a ping to the check URL appended by /start.
After receiving the start event, Healthchecks will wait for a signal success withing the configured "Grace Time". So if your grace time is 20 minutes, your script should execute in less than 20 minutes. If no success signal has been received after the "Grace Time", the check is marked as "down" and you get an alert !
Alerting
Healthchecks is capable of sending you alerts via emails, twilio, or other systems when an error occurred. But I prefer having notifications on my Android phone without stuffing my inbox. To manage these notifications I use Gotify: a simple self-hosted server written in Go to send and receive messages. It also comes with an Android application!
Final docker-compose
Here is a modified docker-compose including Gotify:
version: '2'
services:
  gotify:
    container_name: 'gotify'
    image: 'gotify/server:latest'
    restart: unless-stopped
    environment:
      - GOTIFY_SERVER_SSL_ENABLED=false
      - GOTIFY_SERVER_SSL_REDIRECTTOHTTPS=false
    ports:
      - 127.0.0.1:22280:80
      - 127.0.0.1:22243:443
    volumes:
      - './gotify_data:/app/data'
  healthchecks:
    container_name: 'healthchecks'
    image: linuxserver/healthchecks:latest
    environment:
      - PUID=1001
      - PGID=1001
      - DOCKER_MODS=linuxserver/mods:healtchecks-apprise
      - SUPERUSER_EMAIL=my@email.com
      - FILE__SUPERUSER_PASSWORD=./secrets/SUPERUSER_PASSWORD

    ports:
      - 127.0.0.1:22380:8000
    volumes:
      - ./healthchecks_data:/config
    restart: unless-stopped
    depends_on:
      - gotify
Restart everything with docker-compose restart to create your Gotify container.
Using Gotify
Here I am assuming that you set up a Nginx reverse proxy that forwards the packets coming from https://my-gotify-server.com.
Connect to your Gotify server, the initial creds are admin and admin. There, create an application named "Healthchecks" and save the token, we use it later on.
You can then configure clients if you wish (android phone or tablet), but for testing purposes you can just stay logged in on the web application which also acts as a client.
Adding the Gotify integration
Now that we have a Gotify server up and running we can use it as an alert system with healthchecks !
To do so we go to the "Integrations" tab in our Healthchecks project and add an "Apprise" integration. There we fill the URL like this:
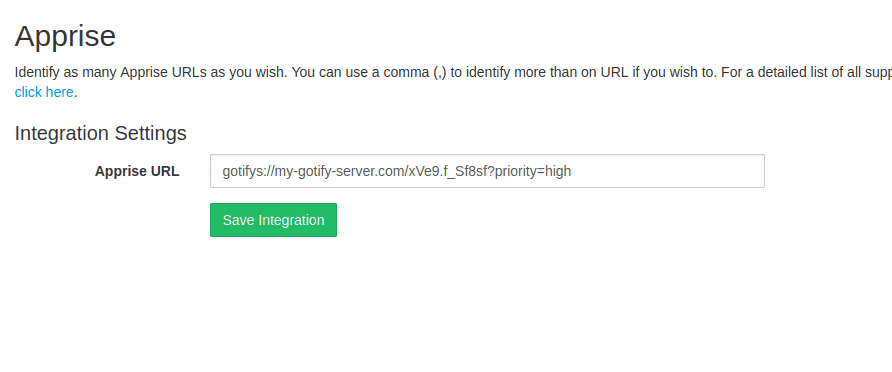
- The
sat the end of "gotify" indicates that we are using a secure connection. xVe9.f_Sf8sfis the token we copied earlier.- The query parameter
priority=highis optional.
Check out the apprise documentation for more info.
Now that our integration is added, we should see it in our list. Click on the Test button to check that it works.

Final thoughts
Thanks to Healthchecks and Gotify we solved the issue of silent failures. Whenever one of our backup fails, we will receive a notification. This workflow can be applied to anything that is a cron job. Here are some ideas:
- a cron job that renews your Let's Encrypt certificates
- a cron job that updates your Docker containers with Watchtower
- a cron job that fetches some data from an API
- a job linked to a continuous integration / deployment pipeline
In the next article I describe how I structured my backup script and how I run it when I need to backup files with special permissions.